Interactive installation
Agama features a web-based user interface that you can use to install the system either locally or from a remote device. For local installations, once you boot the Live image, you should get to the product selection screen. If you want to connect from a remote device, please check the connecting remotely section.
Assuming that you are already connected to the system you want to install, let's go briefly through the installation workflow.
Installation process
Product selection
Agama allows installing several SUSE and openSUSE-based distributions. The openSUSE-based image image includes Tumbleweed, Leap 16.0 Beta, Leap Micro 6.2 Beta, Slowroll, Kalpa and openSUSE Micro OS.
It is noteworthy to mention that the product selection does not only determine which software we will install, but it may affect other aspects like the system's partitioning.
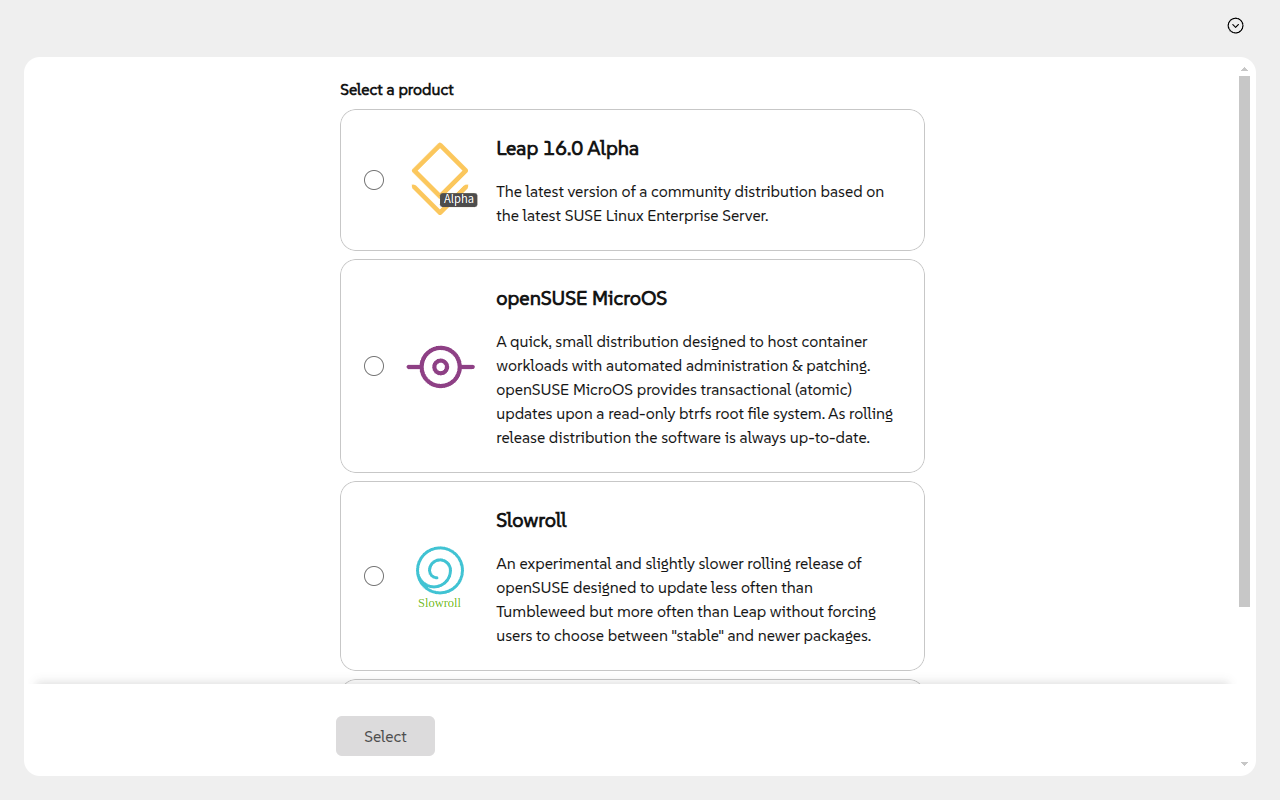
You can change the product later if you change your mind, but you should carefully check the configuration as some values can be reset.
The overview page
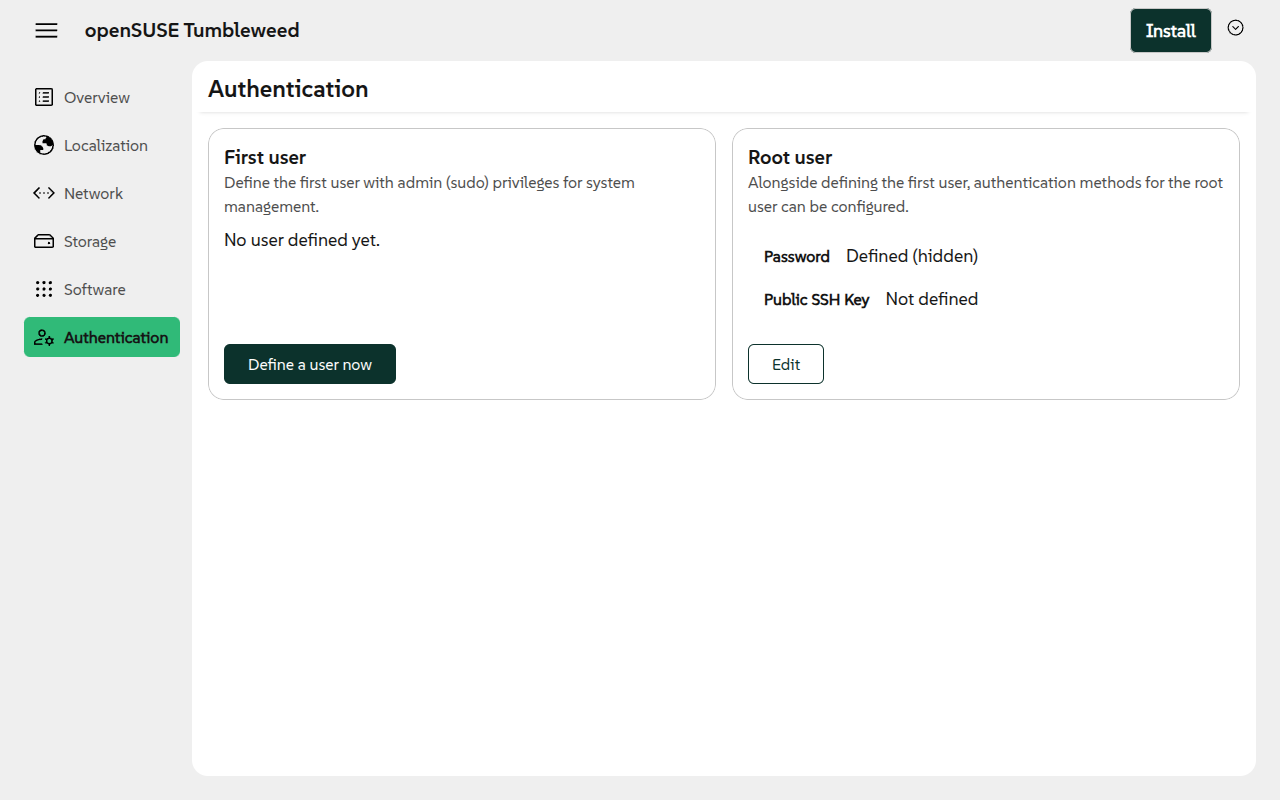
Once you select a product, Agama takes you to the overview page. In the main area, you can find a
summary of the installation settings (localization, storage and software) and a list of things you
need to fix before starting the installation. In the image below, Agama is asking to define a user
or set an authentication method for the root user.
If there are no issues to solve, Agama will display the Install button which, unsurprisingly,
starts the installation. Check the Starting the installation section for further
information.
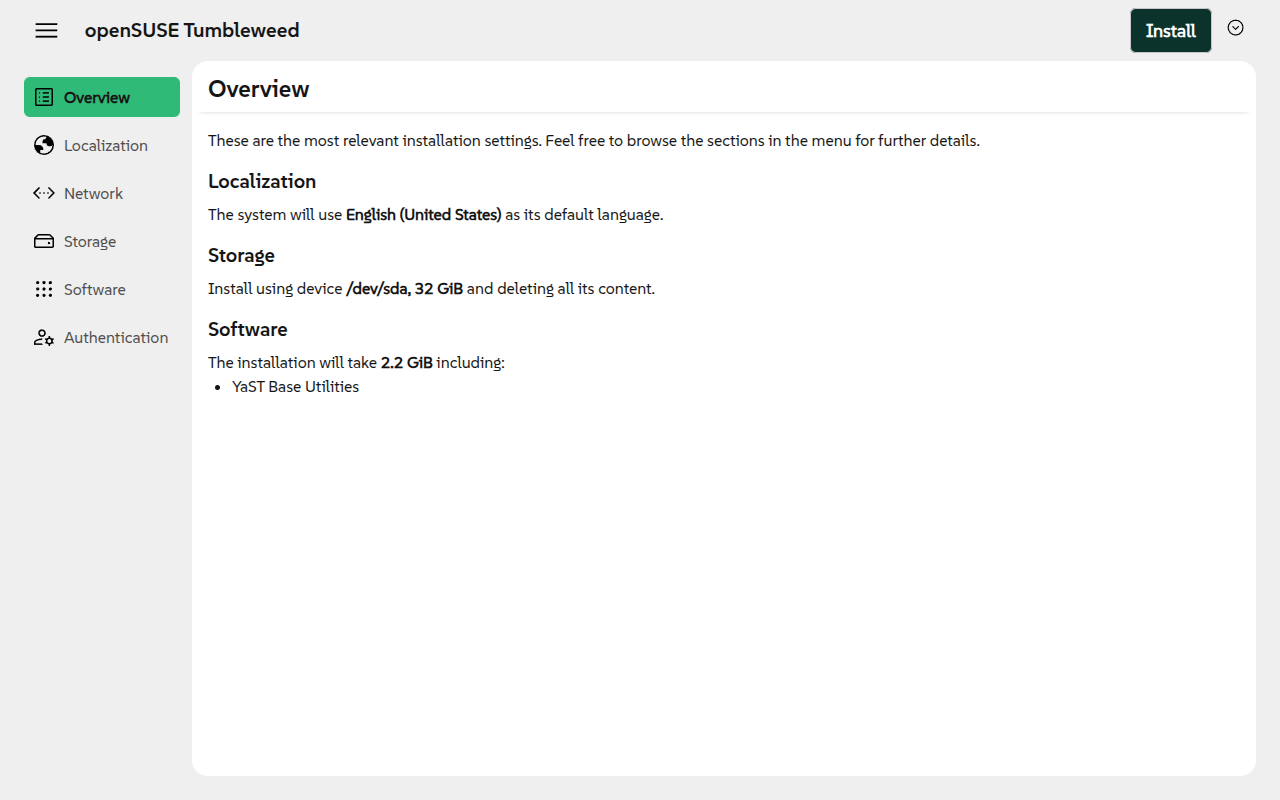
However, it is worth to pay attention to the rest of the page. The sidebar at the left contains a set of links to navigate to different installer areas (e.g., Localization, Network, Storage, etc.). You can follow those links to revisit and/or change the installation settings for those areas.
This sidebar can be shown/hidden by clicking in the icon at the top (the one with the three bars). It is important to know that, depending on the form factor of your device, this sidebar could be automatically hidden.
Below those links, you can find a Change product link that allows you to select a different product, as discussed above.
Finally, at the top right corner, there is an icon that displays the localization settings for the installer itself. It is important to know that changing them would not have effect on the installed system (use the Localization section instead).
Registration
If a product must be registered (e.g., SUSE Linux Enterprise Server 16), then a Registration section is offered. In that section, the product can be registered through the SUSE Customer Center server or specifying a custom registration server (RMT or SCC proxy).
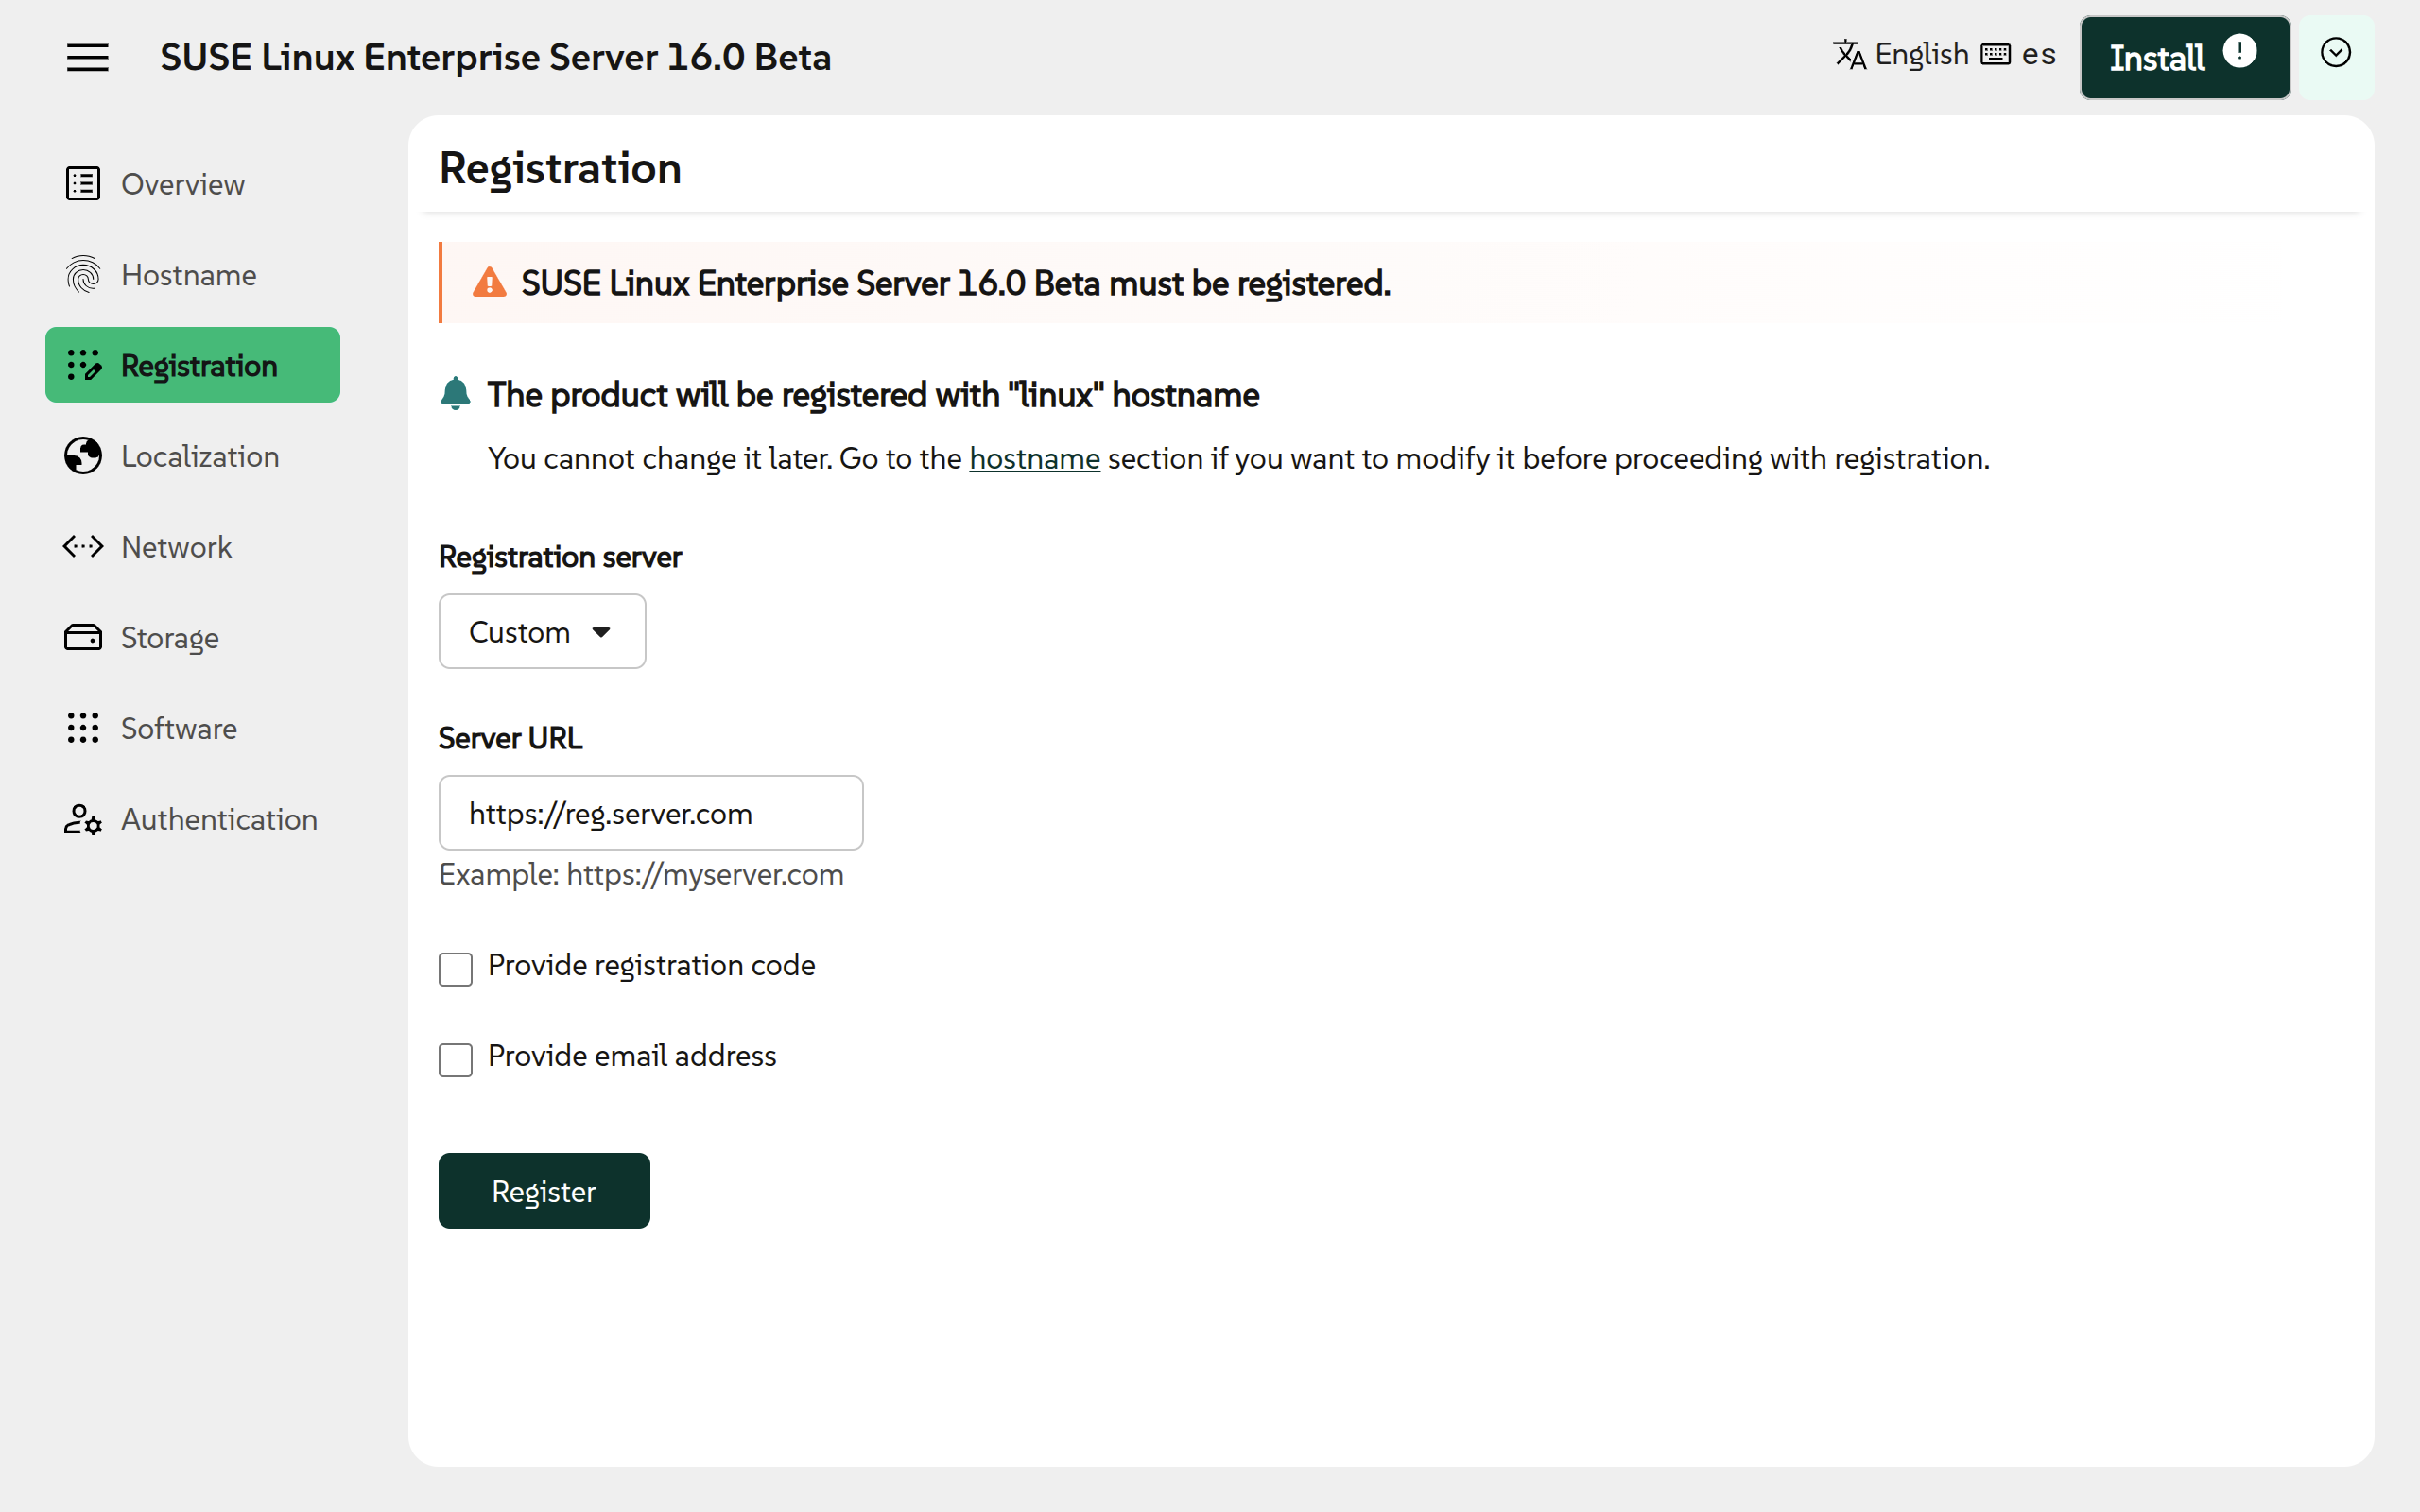
The product will be registered using the hostname configured in the Hostname section. Note that the hostname cannot be changed after registering the product.
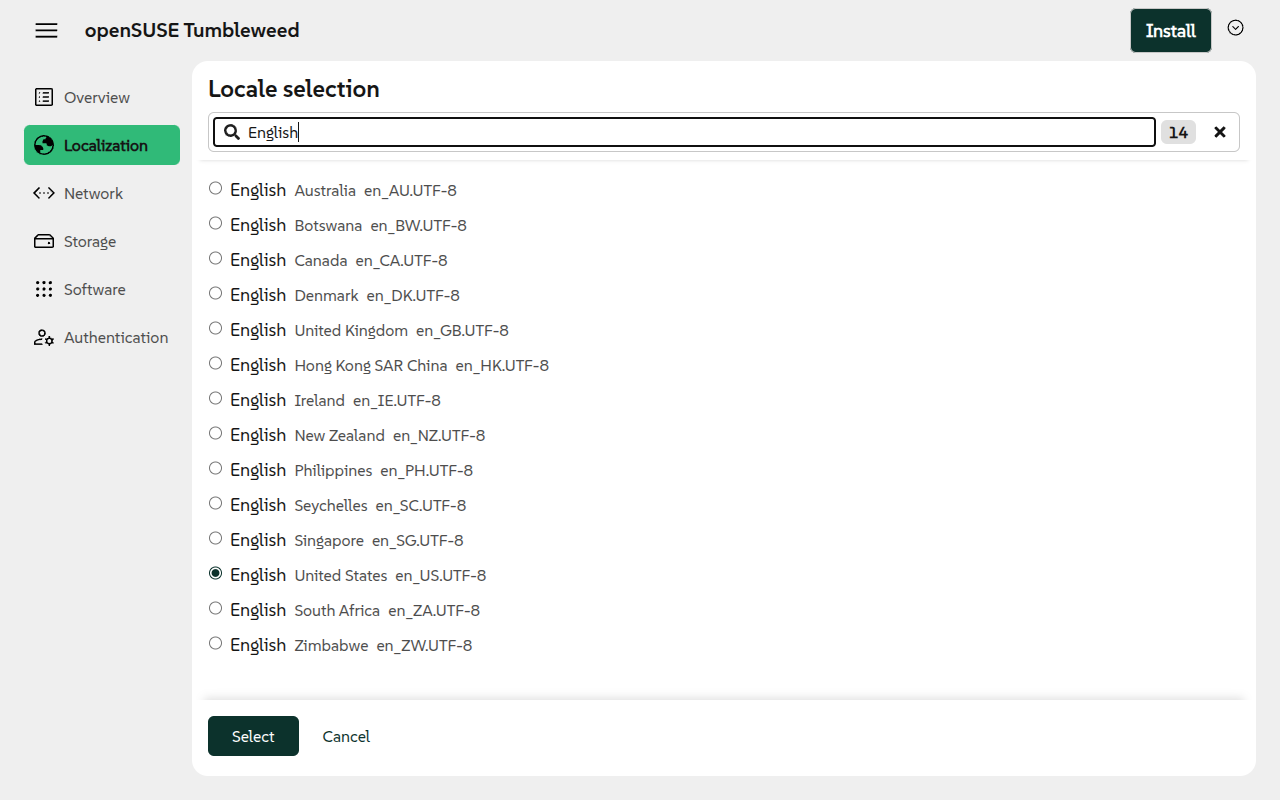
Localization
This section allows to select the language, keyboard layout and timezone that the system you are installing will use. Just click on the corresponding Change button to change any of them.
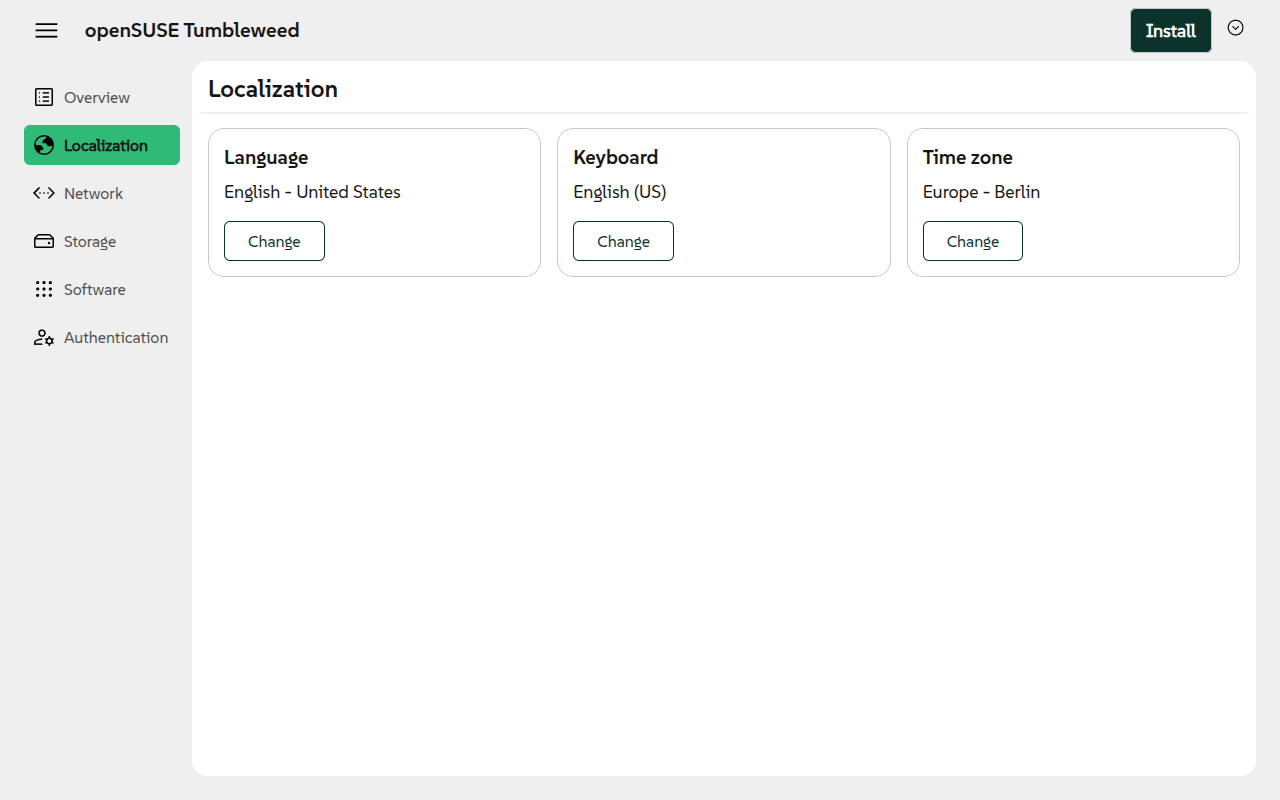
As there are dozens of possible values, Agama features an small search box to make it easier to find the value you want to select.
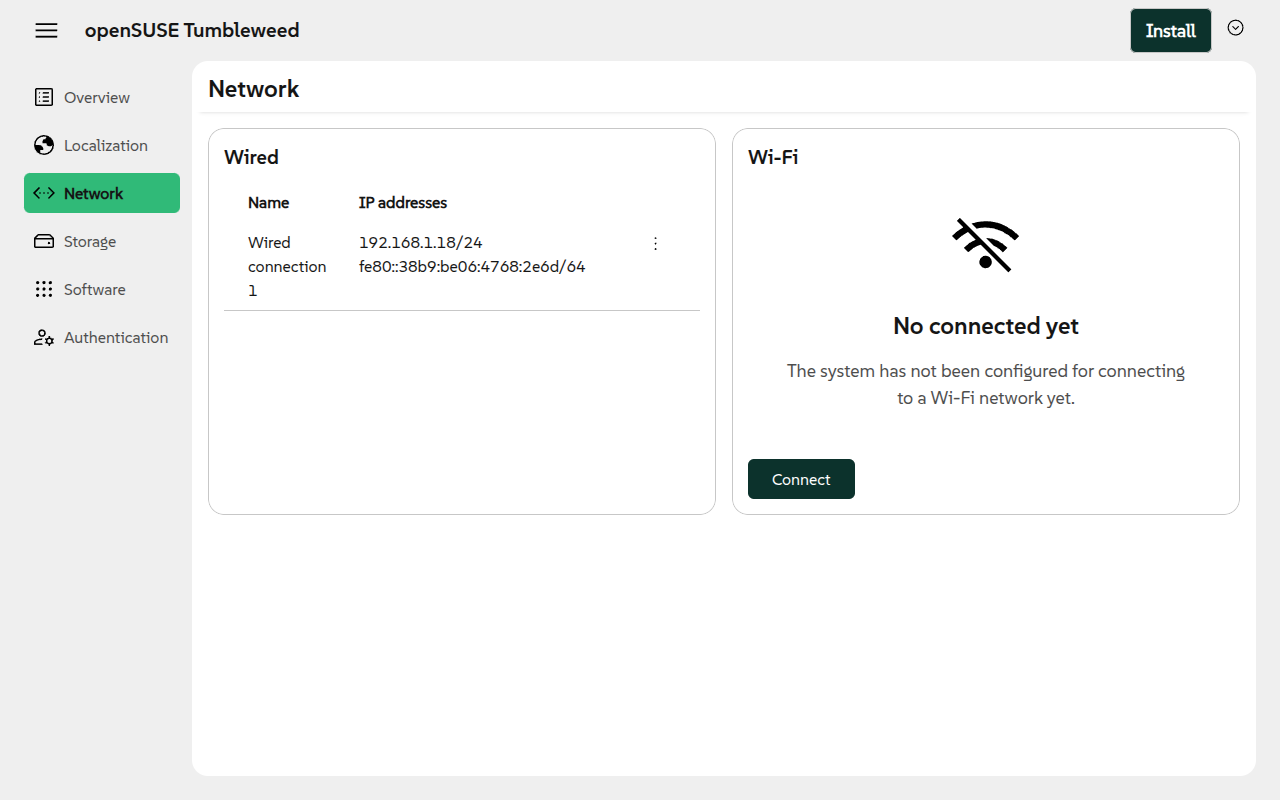
Network
Agama makes it easy to adjust your network configuration. It allows setting up wired and wireless devices, specifying the mode (DHCP/manual), IP addresses, name servers, etc. Advanced connections types, like bridges or bonds, does not have support in the user interface yet. However, it is a matter of time that they get added, given that Agama supports many of them during an unattended installation or using the command-line interface.
Beware that network configuration changes are applied instantly. So you must be careful when adjusting the network configuration on a remote installation.
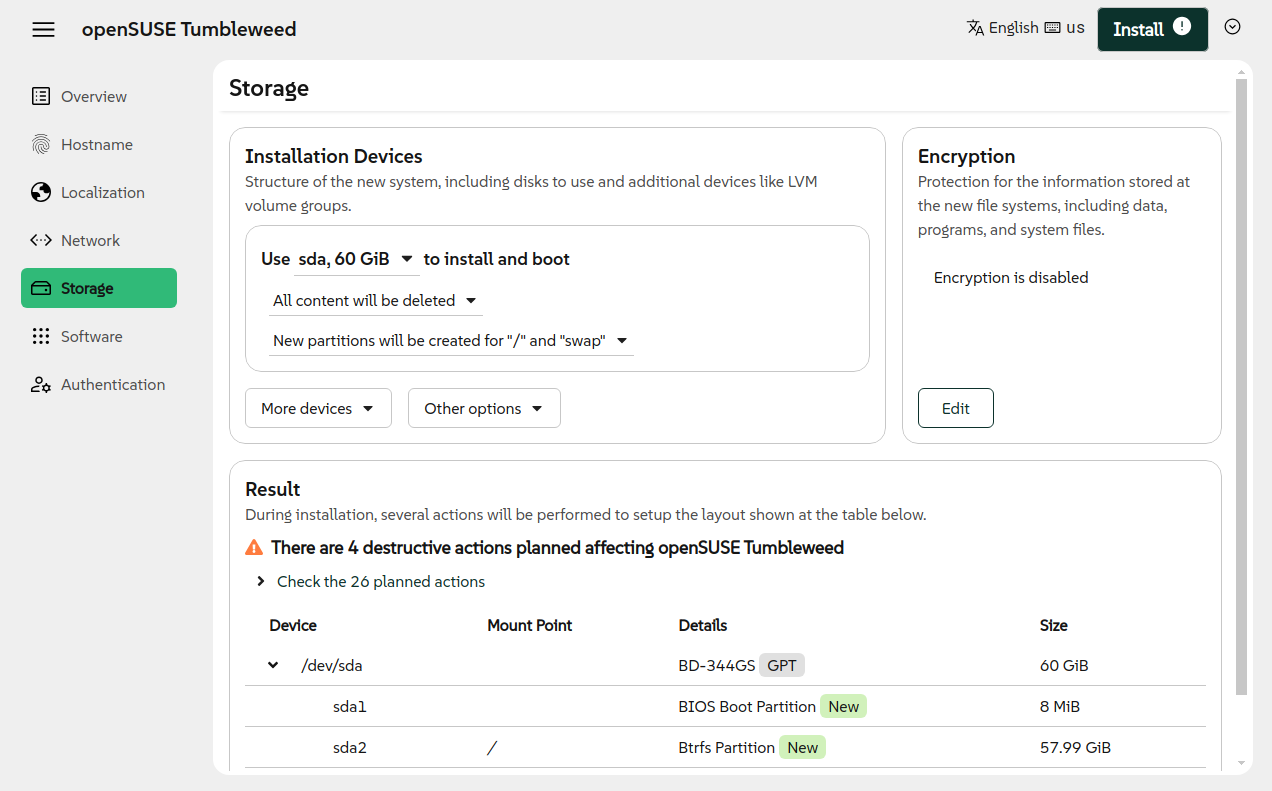
Storage
Setting up the different file systems and their corresponding logical devices -like partitions, LVM volumes or RAIDs- is one of the most complex aspects of the installation. Agama offers great flexibility in that regard.
The Agama approach to storage configuration is detailed on its own separate section.
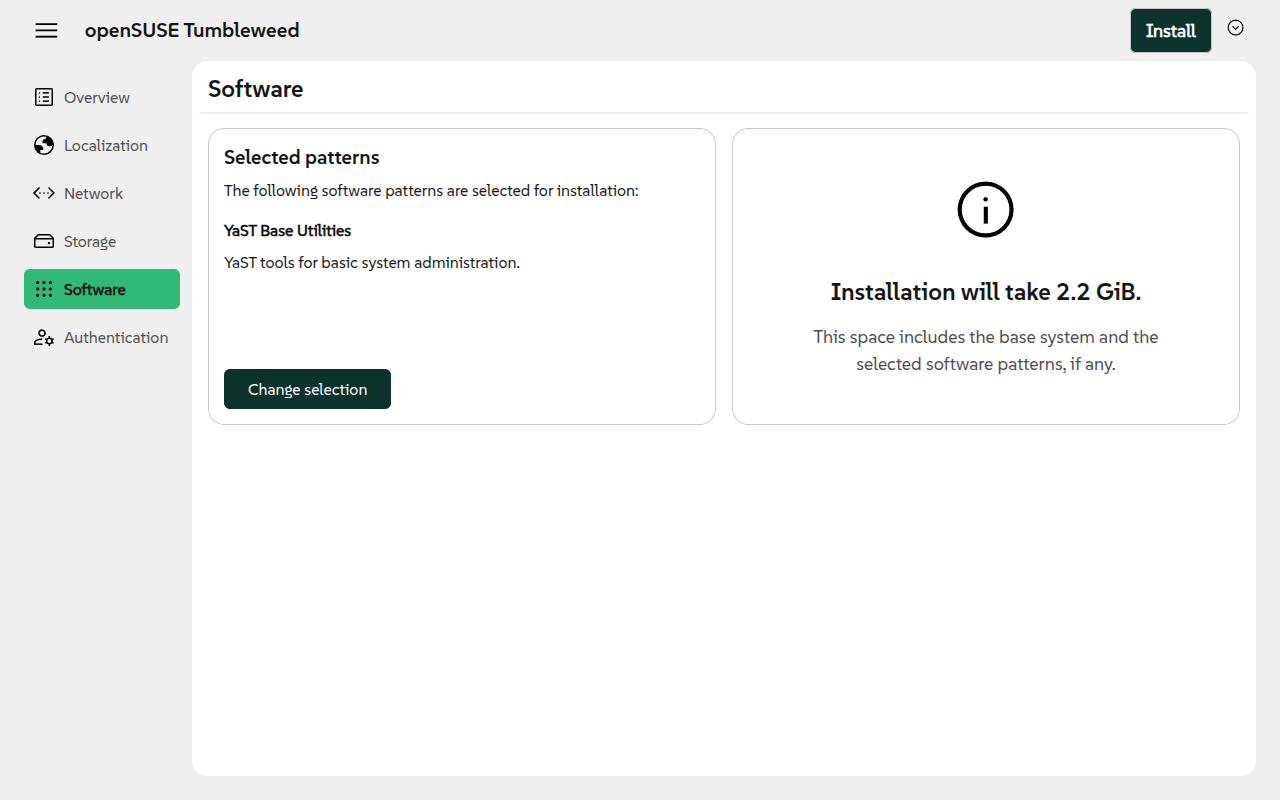
Software
Agama software selection is rather simple. Depending on the product, it offers a reduced set of software pattern. The image below partially shows how the software selector looks like. As in other places of the interfaces, Agama offers a search box. If you need any advanced package selection, we suggest to do it once the system is installed.
Users
Most likely you need a mechanism to access the system once it is installed. Agama offers you to set
up a root authentication method (a password or a public key) and/or to create a dedicated user. It
is mandatory to do any before starting the installation.
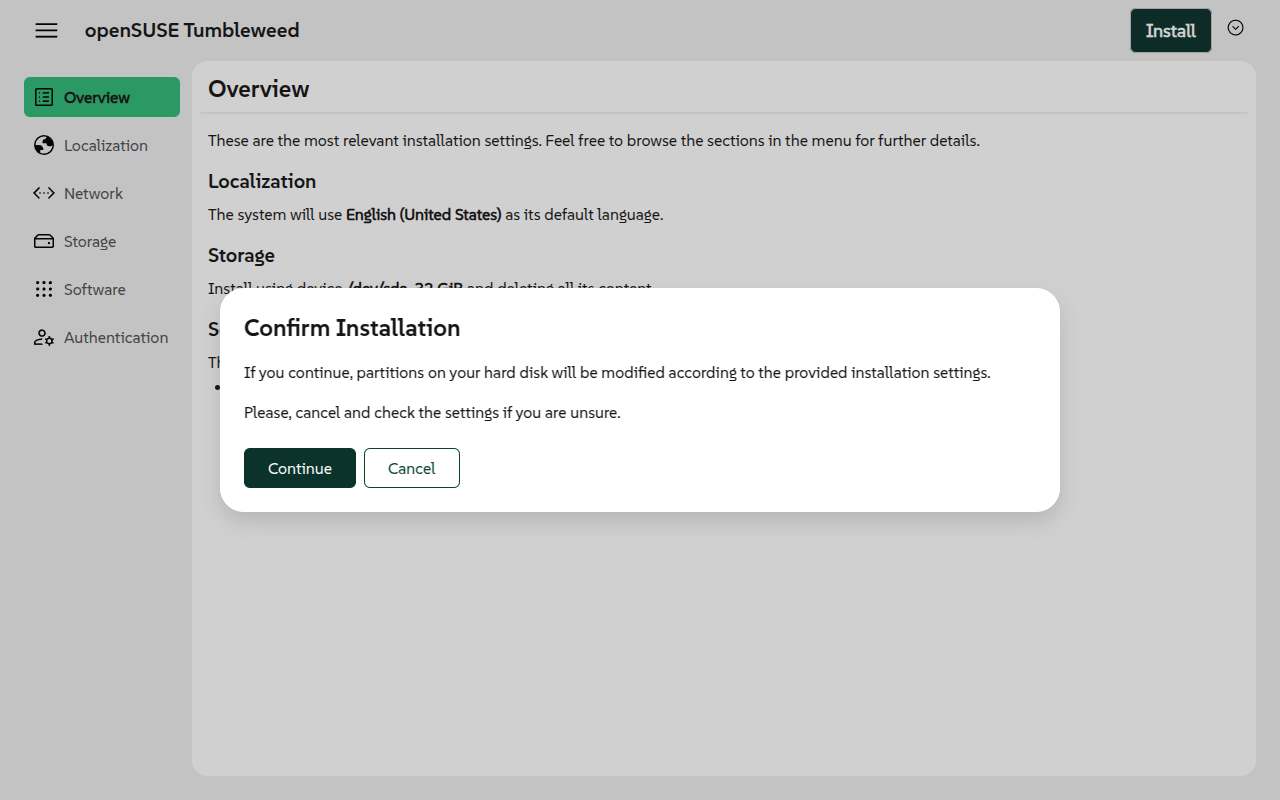
Starting the installation
The overview page displays an Install button if all the issues are solved. After clicking the
button, Agama ask for confirmation. Once you accept, the installation starts.
Remote access
The Live ISO automatically starts a graphical interface (using the local browser). However, you
might want to access remotely to the installer. If you know the IP address of the system, you just
need to point your browser to https://$IP.
For the case you do not know the address, or just for convenience, the Live ISO is configured to use
Multicast DNS (sometimes called mDNS, Avahi,
Zeroconf, Bonjour) for hostname resolution. Therefore, connecting to https://agama.local should do
the trick.
.local hostnameDo not use the .local hostnames in untrusted networks (like public WiFi networks, shared
networks), it is a security risk. An attacker can easily send malicious responses for the .local
hostname resolutions and point you to a wrong Agama instance which could for example steal your root
password!
The mDNS resolution also works for other services like ping or SSH. So you can use commands like:
ping agama.local
ssh root@agama.local
If you want to know more about the mDNS support, please check the remote access documentation.